
Snowman Accordion
Card – 5 ½” x 8 ½”
and 5 ½” x 9”
Stamp - Stampendous Shape Shifting Jumbo Snowman
This card is demonstrated by Fran from Stampendous on You Tube

Reindeer Over House
Card – 8 ½” x 5 ½”
White cardstock
Punch – 2 small star punches
Stamp – Hero Arts Christmas Reindeer
Stamp - Hero Arts Mi Casa
Stamp “Have Yourself A Cozy Little Christmas”
Stamp - Hero Arts Mi Casa
Stamp “Have Yourself A Cozy Little Christmas”
Stamp – “Have Yourself A Cozy Little Christmas”
Copic Markers
-
Stamp Reindeer over the house
-
Colour
copic markers: sweater YG61, YG63, YG67
reindeer
& house E25, E31, E35
roof
& trim on house W4, W6
windows
Y02
dots on reindeer & house door R24
dots on reindeer & house door R24
- Punch out 1 large & 3 small stars & glue
behind reindeer
This is a Darlene DeVries Design

Holy Triptych
Card – 8 ½” x 5 ½” Not
Quite Navy cardstock (fold in half)
Inlay – 5 ¼” x 4” Silver cardstock
Inlay – 2 ¼” x 4¼” gray
cardstock
Inlay – 2” x 3 ¾” Not
Quite Navy with stamped image
Stamp Set – Holy Triptych
Stamp - Swirl
Metalic Pencil Crayons – light purple, gold & silver
Ribbon – sheer white
Punch – Ticket Corner
Embossing Powder - silver
-
Punch 4 corners on inlays
-
Stamp silver inlay with swirly stamp
-
Emboss with silver embossing powder
-
Tie ribbon around silver inlay and glue to card
-
Colour Angel hair, robe and wing with pencil crayons
& glue to gray
inlay

Cat & Dog Christmas
Card – 8 ½” x 5 ½” white
cardstock
Stamp Set – Penny Black Joy to the World
Stamp – different sizes of snowflakes
Copic Markers – E49, E53, E50, R27
Nestibility – Labels 8 (2nd largest)
Punch – Circle 1 ¼”
Punch – Circle 1 ¾”

Merry Christmas Welcome
Card – 8 ½” x 5 ½” ivory cardstock
Inlay - 5 1/4" x 4" ivory
Door panels - (2) 2 1/4" x 2 3/4" and (1) 3" x 1 3/8"
Inlay - 5 1/4" x 4" ivory
Door panels - (2) 2 1/4" x 2 3/4" and (1) 3" x 1 3/8"
Punch - pine branch
Red Ribbon
Brad
Red Ribbon
Brad
I cut out a wreath from my cricut or make one with punches or nestibities to glue on the pine branches

Moose Christmas Card
Cartridge – Joys of the Season Tree Page 59
-
cut tree 4”, (cut off stump)
-
cut tree 3”, (cut off stump)
-
cut 2 trees 1”, green paper, regular cut (cut off
stump)
Punch - scalloped circle
Punch - 1 3/8" circle
Quickutz - deer is cut from brown fuzzy cardstock
Use brown cardstock to make trunks

Winter Woodland Skater
|
- cut skater 3” black paper, tag + skater
- cut tag 3” white paper, tag-shift + skater
Card -11” x 4 1/4” white paper, fold in half & round edges
|

Joy Fold Card
Cartridge – Joys of the Season
House Page 50
|
- cut house 3”, reddish brown paper
- cut house 3” tan colour paper
- cut house 3” green patterned paper
Punch - Stampin' Up scalloped circle
Punch - Stampin' Up 1 3/8" circle
Card - 8 1/2” x 4 ¼” double
sided paper
http://www.youtube.com/watch?v=1TzFlHKnzb8
Sparkle Trees
Stampin Up stamp set “Lovely as a Tree”
Stamp tree on ivory paper 4 ½” x 2 ¾” with dark green ink
stamping first on a scrap ivory card stock and then on the 4 ½” x 2 ¾” ivory
paper without reinking
-
stamp sparkle on bottom left corner of stamped trees
again stamping on
scrap paper and then on inlay
scrap paper and then on inlay
-
cut out the tree on the scrap ivory card stock &
pop dot on top of trees
-
dot trees with glue and then glitter

Peace on Earth
Cartridge – Doodle Charms (4 Tree Border on Page 125)
-
cut trees brown paper 2”
-
cut trees green pattern 2”
-
cut trees different green patter or plain green 2”
Cartridge – Paper Doll Dress Up (Mountain on Page 78)
-
cut mountain white paper 2”
-
cut sheep black paper 2”
-
cut sheep white paper 2” (cut off face, ear, legs &
tail)
Cartridge – George (Star on Page 94)
-
cut star yellow paper 1”

Snowman Family
Punch - Stampin' Up scalloped border
Punch - Stampin' Up Large Tag
Punch - Stampin' Up Small Tag
Punch - Stampin' Up 1 1/4" circle
Punch - Stampin' Up 1 3/8" circle
Punch - Stampin' Up scalloped circle
Stamp - Stampin' Up
Stamp - Stampin' Up Mix & Mingle

Pop Up Santa
Cartridge – Christmas Cheer (Snowman Page 122)
-
cut snowman 3”, white paper, regular cut (cut off arms,
hat & scarf)
-
cut snowman 3”, black paper, blackout (cut off scarf)
-
cut snowman accessories (orange for nose) (scarf)
Card - 11” x 4
¼”

Happy Holidays Hanging Ornament
Ornament on Page 62 (cut @ 2 1/2")
Cartridge – Winter Woodland
Snowflake on Page 35 (cut @ 1 1/4")
Stamp - Stampin' Up Baroque Motifs or similar
Punch - Scalloped Border
Stamp - Happy Holidays

Snowflake Skate
- cut skate 3” black
- cut skate 3” blue paper overlay
- cut skate lace white paper
Cartridge – Winter Woodland Page 35 Snowflake
- cut snowflake 2” white paper
- sparkle snow flake & pop dot to front of card
- sparkle skate blade & glue on skate lace
- pop dot skate to card
|


Snowman on Skiis
Cartridge – Christmas Cheer
Snowman Page 122
-
cut snowman 3 1/2”, white paper, regular cut (cut off
arms, hat & scarf)
-
cut snowman 3 1/2”, black paper, blackout (cut off
scarf)
-
cut snowman accessories
(scarf)
Cartridge – Winter Woodland
-
cut skis (page 52) 3 ½” brown paper
-
cut Let It Snow
(page 62) 2” white paper


The Mitten Tree
Stamps –Stampin Up “Flaky Friends”
Card- 8 1/2” x 5 1/2”
Embossing Folder - Snow Flakes
Stamp - Stampin' Up
Stamp - Polka Dots & Paisley
Local Rubber Stamp - crackled
- polka dot & emboss front of chocolate chip card with “Polka Dots & Paisley” stamp and clear embossing powder

Happy Holidays
Stamps –Stampin' Up “Peaceful Wishes”
Card – 11” x 4 ¼” off white paper & fold in half
Inlay - 4 ¼” x 3”
chocolate chip paper
Inlay - 4 ½” x 3” light
green paper
-
Stamp pine branch to green inlay with dark green ink
-
Stamp Happy Holidays below branch
-
Stamp pine cone on scrap white paper with brown ink
-
Cut out pine cone and pop dot to pine branch
-
Put ribbon around chocolate chip paper and glue to card
-
Pop dot green inlay on chocolate chip paper
-
Gel white stitches around green inlay and below and
above chocolate
chip inlay
chip inlay

Christmas Blessings
Stamps –Stampin Up “Peaceful Wishes”
Card - 11" x 4 1/4" off white paper
Inlay - 3 ¾” x 3 ¾”
off white paper
Inlay - 4” x 4” light
green paper
-
Stamp pine branch
to off white inlay with green ink
-
Stamp berry branch over pine branch with gold powder
& emboss
-
Stamp pine cone over branch with brown ink & emboss
-
Stamp “Christmas Blessings to you and yours” in brown
ink and emboss
-
Glue green inlay to card
-
Glue off white inlay to green inlay
-
Put brown bow at top left

Peace
Stamps –Stampin Up “Peaceful Wishes”
Card – 8 ½” x 5 ½”
green paper & fold in half
Inlay - 2 ¾” x 3” red
paper
Inlay - 2 ½” x 2 ¾” off
white paper
-
Stamp pine branch to right bottom of off white inlay
with green ink
-
Stamp berries on pine branch with red ink
-
Stamp “Peace” on off white top left corner
-
Glue off white to red inlay
-
Put bow around red & off white inlay and tie in
knot
-
Stamp pine branch from right bottom corner to top left
corner in green ink
-
Glue off white & red inlay on pine branch right
bottom corner

Swirl Snowflake
Cartridge – Winter Wonderland (Snowflake - Page 35)
-
cut snowflake 3”, red paper
Card - 8 1/2” x 5
1/2” red paper & fold in half
Inlay 5 ¼” x 4” ivory paper
Inlay 5” x 3 ¾” chocolate chip paper
Strip – 5 ¼” x 1” ivory paper
-
Stamp chocolate chip paper with VersaMark ink a swirly
pattern such as
Stampin Up Baroque Motifs or similar at top of inlay
-
Emboss with a sparkle gold embossing powder
-
Stamp “Season’s Greetings” to right side of ivory strip
-
Glue ivory inlay to card
-
Glue chocolate chip inlay to card
-
Glue strip underneath embossed swirl
-
Put gold brad in middle of snowflake
-
Pop dot snowflake to left side of card on strip
Andrea Walford design
http://www.youtube.com/watch?v=4YIjdZGYSyM&list=PLBE449FB9EC87F499
Andrea Walford design
http://www.youtube.com/watch?v=4YIjdZGYSyM&list=PLBE449FB9EC87F499

Jingle Shells Slider Card
Stamp Set – Stampin Up “Crab & Company

Three Tree Embossed Card
Card – 8 ½” x 5 ½”
chocolate chip paper (fold in half)
Inlay – 5 ¼” x 4” white paper
Inlay – 5” x 3 ¾” green paper
Inner chocolate chip inlay – 4” x 3 ¼”
Inner white inlay – 3 5/8” x 2 6/8”
Inner green inlay – 3 ½” x 2 ½ stamped with trees
Stamp Set – Stampin' Up “Patterned Pines”
Stamp - snowflakes
Punch - scalloped border
Embossing Folder - Snowflakes
-
Stamp trees on inner green inlay with Versa Mark ink
-
Emboss with a sparkly green embossing powder
-
Stamp trees again on scrap green with chocolate chip
ink and cut out
middle tree
-
Stamp snowflake on & around trees with “All Purpose
Ink – Frost
White” with a dabber
- emboss green inlay with snowflakes folder
-
Pop dot the cut
out tree to the middle tree on the inner
green inlay &
spray both green inlays with Shimmer Mist

Winter Scene

Dangling Ornament Card
Card – 11” x 5” white or black
Inlay - 5 ¼” x 4” blue, yellow, red
Inlay 3 ½” x 3 ¾” white bleedproof paper
Copic markers
Stamp – Hero Arts Clings Hanging Christmas Ornaments
Punch - Scalloped border
Glitter
Ribbon
Stamp “Holiday Greetings” or “Merry Christmas”
-
Stamp ornaments on white bleedproof paper and colour with copic
markers
-
Glitter circles and stripes on ornaments
-
Put glossy accent on circles on string
-
Glue scalloped border to bottom of ornaments
-
Put bow between white bleedproof paper & scalloped
border
-
Stamp Holiday Greetings at bottom of card

Wonderland Dasher
Stampin' Up stamp set - “Dasher”
Card - 11” x 4
¼” White, fold in half
Inlay – 5 ¼” x 4” Blue (to match embossing powder)
Inlay – 4 ½” x 3 ¾”
White
Scrap paper –White for trees
Strip – 3 ¾” x ½” White for words at bottom of card
Stamp – Hero Arts (clings) Winter Trees
Die – Memory Box Cottage in the Woods
Ink Pad – blue to match embossing powder
Embossing Powder – blue to match card inlay
Embossing Powder – black
Versa Mark
Stamp or typed – Winter Wonderland
-
Stamp Winter Trees on white inlay with versa mark
-
Emboss with blue embossing powder
-
Tear piece of scrap paper and sponge blue for hills
-
Stamp Dasher on card with versa mark & emboss with
black
embossing powder (if dasher doesn’t come out dark enough, I use a
black
marker and colour him in)
-
Glue 2 trees & pop dot 3rd tree
-
Type or stamp Winter Wonderland and cut to above strip
size
- Put diamonds on antler
My own design

Dasher – Card 1
Stamp - Stampin' Up “Dasher”
Stampin Up “ Lots of Thoughts”
Card - 11” x 4
¼” White
Inlay – 3 ¾” x 3 ¾” chocolate chip (round top edges)
Inlay – 3 ½” x 3 ½” patterned paper (round top edges)
Inlay – 2 1/8” x 2 ¾” chocolate chip
Inlay – 2 5/8” x 2” white
Tag – 2” x 1” chocolate chip
Punch - 1 3/8” circle
Punch - 1 ¼” circle
Punch – Stampin' Up word window
Punch – ticket corner punch
Embossing folder strip (buttons)
Ribbon
-
Stamp Dasher on white square chocolate chip
-
Emboss card 1” from bottom with button folder
-
Punch ticket corners on 4 sides of 1” x 2” chocolate
chip
-
Punch chocolate chip with 1 3/8” punch and glue behind
tag
-
Punch co-ordinating colour with 1 ¼” punch and glue on
front of tag
-
Stamp “Merry Christmas” on white word window and glue
to top of
circle
-
Tie bow at bottom of card

Dasher - 2
Stamp - Stampin' Up “Dasher”
Stamp - Stampin' Up “be merry”
Card - 8 ½” x 5 ½” Black
Square – 3” x 3” Silver
Square - 2 3/4" x 2 3/4" White
Square - 2 1/2" x 2 1/2" Black
Silver ribbon
- stamp Dasher on black square with versa mark and emboss with silver
embossing powder
- stamp be merry with versa mark and emboss with silver embossing powder

Dasher – Card 3
Stamp - Stampin' Up “Dasher”
Card - 11” x 4 ¼” Black cardstock
Inlay – 5 1/4" x 4" White cardstock
Nestibility - Classic Ovals Large (2nd largest)
Nestibility - Classic Scalloped Ovals (largest)
Embossing Folder - Swiss Dots
Stamp - Stampin' Up Holiday Greetings
- Stamp Dasher on scrap white paper & cut with nestibility
- emboss swiss dots 4" top of card and & 1/2" on bottom of card leaving approx
3/4" to stamp greeting
- put diamond bling in antlers

Dasher – Card 4
Stamp - Stampin Up “Dasher”
Card - 11” x 4
¼” Crumb Cake, fold in half
Inlay – 5” x 3 ¾” Chocolate Chip
Inlay – 4 ¾” x 3 ½” White
Scrap paper – 3 ¼” x 3 ¼” White
Nestibility - Standard Cricle Large (3rd largest)
Ribbon – White
-
Stamp Dasher on scrap white paper with chocolate chip
-
Cut 2 ¾” circle in centre of white inlay
-
Emboss white inlay with snowflake folder
-
Glue card together
-
Tie ribbon on top of circle

Dasher – Card 5
Stamp - Stampin' Up “Dasher”
Stampin Up “ Sincere Salutations”
Card - 8 ½” x 5
½” White, fold in half
Inlay – 3 ¼” x 3” Crumb Cake
Inlay – 2 5/8” x 3” Black
Inlay – 1 ¾” x 5 ½” Black
Inlay – 1 ¼” x 5 ½” Crumb Cake
Black jewels or black
brads
-
Stamp Dasher on Black square with versa mark
-
Emboss with white embossing powder
-
Stamp Holiday Greetings with black ink in top left
corner
-
Put jewels on crumb cake inlay
- Pop dot or glue dasher to strip

Dasher – Card 6
Stamp - Stampin Up “Dasher”
Cricut Cartridge – Storybook
Page 68 (top note)
Cut 1 top note 3” white sponge edge Old Olive
Cut 1 top note 2 ½” green sponge edge Old Olive
Card - 11” x 4
¼” Old Olive, fold in half
Inlay – 5 ¼” x 4” White
Inlay – 5” x 3 ¾” patterned green
Ribbon – Old Olive
-
Stamp Dasher on old olive top note with versa mark & emboss with
white
embossing powder
-
Glue together and tie a bow under Dasher
-
Glue snowflake to top left corner

Bird Pinwheel Card
Card – 11” x 4 ¼” red
paper (fold in half)
Inlay – 5 ¼” x 4” chocolate chip
Inlay – 5” 3 ¾” very vanilla sponged around edges with
chocolate chip
Strip – ¾” x 3 ¾” chocolate chip or brown ribbon
Pinwheel - 2 – 2 ¾” x
2 ¾” chocolate chip
Punch - Stamin' Up 1 1/4" square (punch 8 - 2 sided paper squares for pinwheel)
Punch – Stampin' Up Twe Step Bird
Punch – Stampin' Up Modern Label
Punch – Stampin' Up Word Window
Punch – Scallped border
Stamp Set – Stampin Up “Lots of Thoughts”
-
Punch choc chip strip on both sides with border punch
or use Brown
ribbon
-
Punch out modern Label punch in red
-
Stamp “Merry Christmas” on word window punch & sponge around –
glue to modern label punch
-
Glue 2 choc chip pinwheels together making a star
-
Starting at top, glue each 1 1/4” square around star
pinwheel
-
Punch out bird in very vanilla & sponge choc chip
-
Punch branches in red


Pop Up Snowflake
5 – 3” x 3” very vanilla card stock
2 – 1 ½” x 1 ½” very vanilla end caps
Stamp-a-ma-jig
1/8th inch ribbon
Bead (1/8th inch hole)
Red inkpad
Light green inkpad
Stamp Set – Stampin Up “Serene Snowlake”
Wheel roller punch - Petals
- score each 3" x 3" at 1 1/2" both sides
- score each 3" x 3" diagonally (only once)
- stamp "Merry Christmas" red ink on stamp-a-ma-jig sheet and stamp large
snowflake in middle (make sure Stampin' Up wording is facing up)
- sponge around each square with red ink
- Flip squares over and wheel roller punch with light green
|
- Stamp over roller punch with small snowflakes red ink - Stamp medium size snowflake on one end cap - Fold each square (diagonal line folded in) - Stamp “Merry Wishes” on other end cap in red - Glue outside edges of each square together - Lay ribbon on end of square, put glue on square & stick on end cap (do both ends) - Run a bead through the ribbons and tie a knot at the top of the ribbons To see video: Stamp With Tami http://www.youtube.com/watch?v=alsA_Bn9TnQ |

Solemn Stillness
Card – 8 ½” x 5 ½” light blue cardstock
Square - 3 1/2" x 4" white cardstock
Square - 3" x 3 1/2" medium blue cardstock
Square - 3 1/2" x 4" white cardstock
Square - 3" x 3 1/2" medium blue cardstock
Stamp Set – Stampin' Up Solemn Stillness
Stamp - dots (for snow)
Stamp - dots (for snow)
Ink Pad – Versa Mark
Embossing Powder – clear
- stamp dots on medium blue square with versa mark
- stamp tree on medium blue square with versa mark and use heat gun to set
- cut medium blue square in 4 quarters & glue to white square
- stamp dots on medium blue square with versa mark
- stamp tree on medium blue square with versa mark and use heat gun to set
- cut medium blue square in 4 quarters & glue to white square

Art Philosophy Snowflake
Card – 8 ½” x 5 ½”
black cardstock
Stamp Set – Close to my Heart (Snowflakes)
Cricut Cartridge – Art Philosophy
Ink Pad – Chocolate Chip
Versa Mark
Embossing Powder – White & Silver
-
Cut off ¾” across front of card
-
Stamp border along inside edge of card & emboss with
silver
-
Cut out large snowflake 3 ¼”, light blue cardstock,
stamp & emboss
with white & sponge around outside with chocolate chip
-
Cut out small snowflake, dark grey cardstock, stamp
& emboss with
silver & sponge around outside
-
Stamp sentiment & little snowflake on light grey
inlay & emboss with
silver
-
Pop dot small snowflake beside large snowflake
To see video: The Stamp Goddess
http://www.youtube.com/watch?v=hk9Blppf9hQ
To see video: The Stamp Goddess
http://www.youtube.com/watch?v=hk9Blppf9hQ

Sleigh Card
Card – 8 ½” x 5 ½”
Punch – border for
red inlay
Stamp Set – Christmas greeting your choice
Cricut Cartridge – George Page 114 Oval White cut 3 ½” &
Oval Red cut 3 ¾”
Cricut Cartridge – Christmas Cheer Page 84 Sleigh cut 1 ½”
Cricut Cartridge – Joys of the Season Page 69 Poinsettia Red
cut 1 ¼”
Cricut Cartridge – Joys of the Season Page 69 Poinsettia
Yellow cut 1 ¼” for
centres
Cricut Cartridge – Winter Wonderland Page 41 Leaves cut 1
¼”

Art Philosophy Scalloped Snowflake
Card – 4 ¼” black
scalloped circle brown cardstock (fold in half)
Front Inlay – 3 ½” circle
patterned cardstock
Circle for Inside card – 3” circle white cardstock
Stamp – Christmas sediment (your choice)
Stamp Set – Close to my Heart (Snowflakes)
Cricut Cartridge – Art Philosophy (cut snowflake 1 3/4")
-
Stamp brown dotted snowflake
- Stamp green snowflake

Small Ornament Card
Card – 8 ½” x 5 ½”
Black cardstock
Inlay – 5 ¼” x 4” crumbcake cardstock
Square – 4” x 3 ¾” Black cardstock
Square – 3 ¾” x 3 ½” patterned cardstock
Strip – 4 ¼” x 2 ¼” Black
Strip – 4 ¼” x 2” patterned
Stamp Set – SU Holiday Happiness
Cricut Cartridge – Artiste Pg 61
Accent 3 key #31 cut at 2 ½” White
Accent 3 key #31 cut at 2 ¾” Black
Markers - Marvy 72 Pine Green, 28 English Red, 18 Dark Brown
Markers - Marvy 72 Pine Green, 28 English Red, 18 Dark Brown
-
Cut out both tags
-
Stamp ornaments & Happy Holidays using markers on
white tag
-
Draw tree branch & black marker string to branch
-
Assemble card & pop dot tag to front

Santa Suit
Card - 8 1/2 x 5 1/2" Red cardstock
Scrap - 5" x 5" white cardstock
Scrap - black for buckle & buttons
Strip – 4 ¼” x 1” Black cardstock for belt
Scrap –
white sparkle cardstock for buckle
Punch – ½”
circle
Punch – Stampin' Up Scalloped
Square
Stamp Set
– Stampin' Up Tags til Christmas
Stamp Set
– Stampin' Up Buttons Buttons
Cricut
Cartridge – Elegant Edges Pg 27
Oblong Shift Key #7
cut at 4” (makes 2 beards)
- cut beard in half
- glue beard to top of card & stamp "even the naughty deserve something
nice!
- glue belt to card & pop dot buckle to belt
- stamp 2 buttons with 1/2" circle punch (use 1/2" circle thick pop dots) to
secure buttons to front of suit

Embossed Squares
Card – 8 ½” x 5 ½”
light gray cardstock (fold in half)
Inlay – 4 ½” x 3 ¼” White cardstock
Inlay – 4” x 2 ¾” light gray cardstock
Stamp – “Merry Christmas”
Silver Ribbon
Punch – Stampin' Up 1 ¼” Square
Embossing Folders – 5 various folders
- emboss scraps on white paper with
embossing folders
-
punch square of each embossed square plus 1
plain square

Circle Snowman
Card – 8 ½” x 4 ¼”
Spellbinders – Petite Scalloped Circles Large 2nd
largest
Spellbinders – Standard Circle Large 2nd largest
white
Spellbinders – Standard Circle Large 4th largest
Snowflake embossing folder for green inlay
Cricut Cartridge – Winter Wonderland
Page 35 (snowflake) 1 ¼” white
I printed Merry Christmas around the circle but I have since used Microsoft Word (word art) for wording around the circle

Let It Snow
Card – 8 ½” x 5 ½”
Pool Party )
Punch – Snowflake
Punch – Scalloped oval
Punch – Stampin' Up Large Oval
Stamp Set – Stampin' Up Let It Snow
Stamp Set – Stampin' Up Cold twigs
Warm hearts!
Glitter – diamond glitter
Embossing Folder - Snowflakes
-
Print snowman on white cardstock
-
Colour snowman hat, scarf, mitts W4, R24, BG45,
-
Colour snowman boots & twigs E25
-
Colour sides of snowman & snow E000
-
Sponge around white stamped inlay with Pool Party
-
Emboss white inlay with snowflake folder
-
Stamp large oval & glue to scalloped oval

Mirrored Tree
Card – 8 ½” x 5 ½” Dark
Green cardstock
Inlay – 5 ¼” x 4” White cardstock
Stamp – Stampin' Up “Seasons Greetings” from the Many Merry Messages stamp set
Stamp – Stampin' Up Lovely As A Tree
Marker – light brown
Ink Pads – Always Artichoke
White Ribbon
Punch - 2 ½” circle
Acetate
- punch 2 ½” circle in Acetate (throw away the
circle)
-
Lay acetate on white inlay and sponge Always
Artichoke inside circle
-
Punch 2 ½” circle on regular photo copy paper (throw away circle)
and
lay over sponged circle
-
Load tree with always artichoke, stamp off on
scrap and stamp over
sponged circle
-
Stamp Season’s Greetings with always artichoke
-
Colour trunk of tree brown


Holiday Ornament
(featured on Stampin' Up Holiday catalogue)
Stamp - Stampin' Up Ornament Keepsakes (or use Christmas cardstock)
Framelits Die - Holiday Ornaments
For instructions see chic'n scratch

Flowered Ornament
Card – 8 ½” x 5 ½”
red cardstock
Stamp Set – a Christmas greeting (your choice)
Stamp Set –
Stampin' Up Delightful Decorations
Paper Clip
Glossy Accents for dots & star
Punch – Stampin' Up Ornament
Punch – Lacey border punch
Butchers Twine – red & white striped

Ornamental Mimi
Card – 8 ½” x 5 ½”
white cardstock (fold in half and front flap in half again)
Stamp Set – Penny Black Ornamental Mimi
Copic – Dress, hat & stars - YR14, YR18, YR65
Ornament
– V15, V06, V17, BG000, BG45, BG49
Face – E51,
cheeks – R20
Hat fur & wings – BG000, BG45, BG49
Hair –
E33, E35
Sweater,
mitts, stockings – V15, V06, V17

Peace on Earth
Card – 8 ½” x 5 ½”
Punch –1” circle
Punch – ¾” circle
Punch - scalloped border
Stamp Set – Stampin' Up City of David
Stamp – Stampin' up Peace on Earth
Stamp - dots
Embossing Powder – White
Nestibility – Classic Ovals Large (largest)
Nestibility – Classic Scalloped Ovals Large (largest)
Versa Mark

Singing Penguins (Front)

Singing Penguins (inside)
Card – 8 ½” x 5 ½”
Light Blue cardstock
Stamp – “We Wish You a Merry Christmas”
Stamp – Penny Black Caroling Penguins
Stamp – SU So Many
Scallops
Punch – 1 ¼” circle
Punch – 1 3/8” circle
Copic Markers – green, red, blue, black & YR24
Swiss Dot Embossing folder
-
cut front of card to make hill
-
rip top of both white inlays to make hills &
sponge around all edges
with Bashful Blue
-
emboss back of card with Swiss Dot folder
-
rub white ink pad on swiss dots for snow
(if this does not show up you can rub versa mark on dots and use
white embossing powder)
-
stamp “Celebrate the Season” and punch with 1 ¼” circle punch
-
punch 1 3/8” circle in light blue
-
colour penguins and cut out
-
sponge Bashful Blue where penguin is going to stand and glue
penguins to card
-
glue “ Celebrate the Season” to blue circle
& pop dot to card

Poinsettia
Card – 8 ½” x 5 ½”
white cardstock (fold in half)
Stamp Set – Christmas Pride (Penny Black)
Stamp – background words (your choice)
Stamp – “Season Greetings”
Distress Ink – Antique Linen, Brushed Corduroy
Walnut Stain, Faded Jeans
Iridescent Medium or diamond stickles
Twine
Versa Mark
White embossing powder
To Jill Fosters video see:

Deer & Bird Christmas
Punch
– Stampin' Up 1 ¾” x 7/8” oval (head)
Punch – Stampin' Up Two Step Bird (wings for deers ears)(branches for antlers-cut leaves to look like branches)
Punch – ½” circle (nose)
Punch – small tag (deers neck)
Punch – Martha Stewart holly leaves
Punch - 1 1/4" circle
Punch - scalloped circle
Snowflake embossing folder
Stamp – Joy at Christmas
Nestibility – Label #8 3rd largest

Simply Ornamental #1
Card – 8 ½” x 5 ½”
red cardstock (fold in half)
Stamp Set – Simply Ornamental
Stamp – background (your choice)
Stamp – “Have a Fashionable Christmas”
Distress Ink – Wild Honey, Fired Brick
Spice Marmalade, Brushed Corduroy
Copic Marker – Dress – R35, R29, R39
Skin – E51, Hair – E31, E35, E29, Shoes – R35
Ornament lines – E31, E35, E29
Paper clip for ornament hanger

Simply Ornamental #2
Stamp Set – Penny Black Simply Ornamental
Distress Ink – Walnut Stain, Wild Honey, Fired Brick
Punch – 1” circle
Ink Pad – Black
Black Marker
Copic Marker – Dress, Ornaments & 1” circle - G07,
Skin – E51, Hair – E31, E35, E29,
Shoes – G07
Paper clips for ornament hangers
Spellbinders – Lable 1 (2 largest)

Singing Reindeer Card
Card – 8 ½” x 5 ½”
chocolate chip paper (fold in half)
Inlay – 5 ¼” x 4” light blue paper
Music strip – 2” x 1 ¼”
Punch – Stampin' Up large oval
Punch – Stampin' Up small oval
Punch – scalloped oval
Punch – ½” circle
Punch – 1 ¾” circle
Stamp – Merry Christmas
Stamp Set – snowflakes

Sleigh Bells Ring
Card – 8 ½” x 5 ½”
Old Olive cardstock
Inlay – 5 ¼” x 4” Crumbcake cardstock
Scrap – 3 ½” x 4 ¼” red
cardstock
Scrap – 4” x 3 ½” Ivory with stamped image
Stamp Set – Sleigh Bells Ring
Markers – SU Old Olive, Copic E55 & R37
Ink Pad – Crumbcake or Close to Cocoa
Spellbinder – Classic Ovals Lg (largest one)
Lacey Ovals (largest one)
-
Cut out red oval with Lacey Ovals
-
Cut out stamped image with Classic Ovals Lg
-
Colour stamped image barn, sleigh, horse & trees
-
Sponge Crumbcake around Crumbcake inlay
-
Sponge crumbcake around stamped image oval
-
Glue red oval to crumbcake inlay
-
Lay ribbon across red oval and glue down to Old Olive
card

Art Philosophy Snowflake #2
Card – 8 ½” x 4 ¼”
Medium Blue cardstock
Circle – 4” Light Blue with “Let it snow” circled
Stamp Set – Close to My Heart Snowflake set “Winter Wonderland”
Cricut Cartridge – Art Philosophy
Page 22 Snowflake cut at 3 ¼’ white cardstock
Page 27 Snowflake cut at 1 ¾” Medium Blue
Page 27 Snowflake cut at 1 ¾” white cardstock
Nestibilities - Standard Circles (largest) Medium Blue
Nestibilities - Standard Circles (2nd largest) Light Blue
Embossing folder – Welcome Baby
-
Put 4” x 4” white front inlay through embossing
folder
-
Stamp “Winter Wonderland” on strip on embossed
inlay
-
Sponge around front inlay & inside inlay
Brocade Blue
-
Print “Let it Snow” in Microsoft Word (word art) cut out (light blue) with
2nd
largest Nestibility circle
-
Put the 3 snowflakes together & pop dot to “Let
it snow” circle
-
Glue pearl in centre of snowflake
-
Glue circles to top of card measuring 5 ½” from top to bottom

Art Philosophy Snowflake #3
Card – 8 ½” x 5 ½” Pool
Party cardstock
Front Inlay – 5 ¼” x 4” patterned cardstock
Inlay strip – 5 ½” x
1 ¼” white cardstock
Inlay strip – 5 ½” 1 ¾” Pool Party cardstock
Stamp Set – Art Philosophy Snowflake set “Winter Wonderland”
Cricut Cartridge – Art Philosophy
Page 22 Snowflake
(layer, shift cut at 3 ¼’ white
cardstock)
Page 22 Snowflake
(Snowflake cut at 3 ¼” Pool Party
cardstock)
-
Stamp “Winter Wonderland” on white strip

Happy Holiday Flags
Card – 8 ½” x 5 ½” Crumbcake cardstock
Square – 4"x 4” White cardstock
Inlay strip – 4 1/4" x 1" white cardstock
Ribbon - brown
Cricut Cartridge – Art Philosophy
Page 22 Snowflake - layer, shift cut at 3 ¼’ white cardstock
Crimper
Embossing Folder - Snowflake
- emboss white square with snowflake embossing folder
- cut white square into 4 strips
- cut 1 end of strips into a V
- crimp 1" strip
Crimper
Embossing Folder - Snowflake
- emboss white square with snowflake embossing folder
- cut white square into 4 strips
- cut 1 end of strips into a V
- crimp 1" strip

Stenciled Ornament
Card – 8 ½” x 5 ½” chocolate
chip cardstock (fold in half)
Inlay – 5 ¼” x 4” white cardstock
Inlay – 3 ¾” x 3 ¼” Chocolate Chip cardstock
Inlay – 2 ¾” x 3” White
Stamp Set – Stampin' Up Christmas Ornaments
Stamp Set – Stampin' Up Christmas
Ornaments
Markers – red & green
Embossing Folder - snowflakes
Ribbon – red
Punch – Stampin' Up Ornament
Ink Pad – Close to Cocoa
-
Punch ornament out of acetate for a stencil (throw away ornament)
-
Emboss snowflake on white inlay
-
Tape stencil to small white inlay and rub with Close to
Cocoa
-
Use red marker & colour bird & Merry Christmas
on stamp
-
Use green marker & colour flourish on stamp
-
Stamp in middle of ornament using stamp-a-ma-jig
-
Use string from stamp set or attach string to ornament
-
Tie ribbon on bottom of card

Stockings Hung on the Chimney with Care
Card – 8 ½” x 5 ½”
Red cardstock (fold in half)
Inlay – 4 ½” x 3 ¾” Crumbcake cardstock
Square - Crumbcake
Square – 2 ½” x 1 ½” White (with Jolly stamped on)
Square – 1 ¾” x 1 5/8” Black
Scrap – red for stocking accessories
Ink Pads – Chocolate Chip
Emobossing Folder – Darice Brick
Stamp – “Festive Fun”
Punch – Stampin' Up Stocking
Punch – Snowflake edge punch or scalloped border
2 small gold brads
Red Glitter
Copics – Red & Green
- score crumbcake inlay at 2 ¾” & 3”
-
rub chocolate chip on brick folder & put
crumbcake inlay to 2
¾” score
line
-
punch mantel edge with snowflake edge punch
-
punch 2 stockings in pattered paper
-
punch stocking accessories in red paper &
glitter paper
-
colour Jolly & glitter berries in wreath
& holly berries
-
attach stockings to fireplace mantel & black
square to fireplace
-
attach Jolly to crumbcake square & pop dot
to card

Tree & House
Card – 8 ½” x 5 ½”
White cardstock
Inlay – 5 ¼” x 4” White cardstock
Inlay – 4 ½” x 2 ¼” Dark Green cardstock
Inlay – 4 ¼” x 2” White Cardstock (tree)
Inlay – 2 ¼” x 2 ¾” Dark Green Cardstock
Inlay – 2” x 2 ½” White cardstock (house)
Scrap Dark Green for pine branches
Punch – Pine Branch
Punch – snowflake
Stamp - Stampin' Up Lovely as a Tree
Stamp – any Christmas House
you have
Copic Markers – W4, , BG96
Ink Pads – Always Artichoke, Black
Thin red ribbon
Red jewels
- put 5 ¼” x 4” white inlay through Swiss
Dot embossing folder
-
Stamp house on 2” x 2 ½” white inlay &
attach to small dark green inlay
-
Stamp tree on 4 ½” x 2” white inlay & attach
to large dark green inlay
-
Colour
copic markers: house W4
trees –
BG96
-
Tie small bow & attach to lamp post &
bling to side of card
- Pop dot house
Attach pine branches
& snowflakes to house edges

Tree in Window Card
Inlay – 5 ¼” x 4” Light Blue cardstock
Inlay – 5” x 3 ¾” White cardstock
Scrap – white for window
Die Cut – Window (Poppystamps.com)
Punch – Pine Branch
Punch – Stampin' Up Word Window
Punch – Stampin' Up Modern Label
Nestibility – Small Rectangle 2 3/8” x 1 7/8”
Embossing Folder – Swiss Dots
Embossing Folder – Snowflake
Small White Pearls
Light blue ribbon
- Cut rectangle with Nestibility in white inlay (do this step 1st before you
emboss)
- Emboss white inlay with Snowflake folder
- Emboss blue inlay with Swiss Dots
- Cut out window with scrap white
- Punch out 10 or so pine branches & build a tree & glue to blue inlay
centered where window will go
- Pop dot window to white inlay
- Put pearls on tree
- Stamp Merry Christmas and punch out with Word Window & glue to Modern
label
.

Santa's Sleigh (inside)

Santa's Sleigh (front) Tri Fold

Snowflake Snowman
Inlay – 2 1/4" x 4 1/4" Red cardstock
Inlay – 1 3/4' x 4 1/4" green patterned cardstock
Stamp - Penny Black Warm & Cold (snowman)
Punch – snowflakes
Nestibility – Standard Circle Large ( 2nd largest)
Nestibility - Classic Scalloped Circle Large (2nd largest)
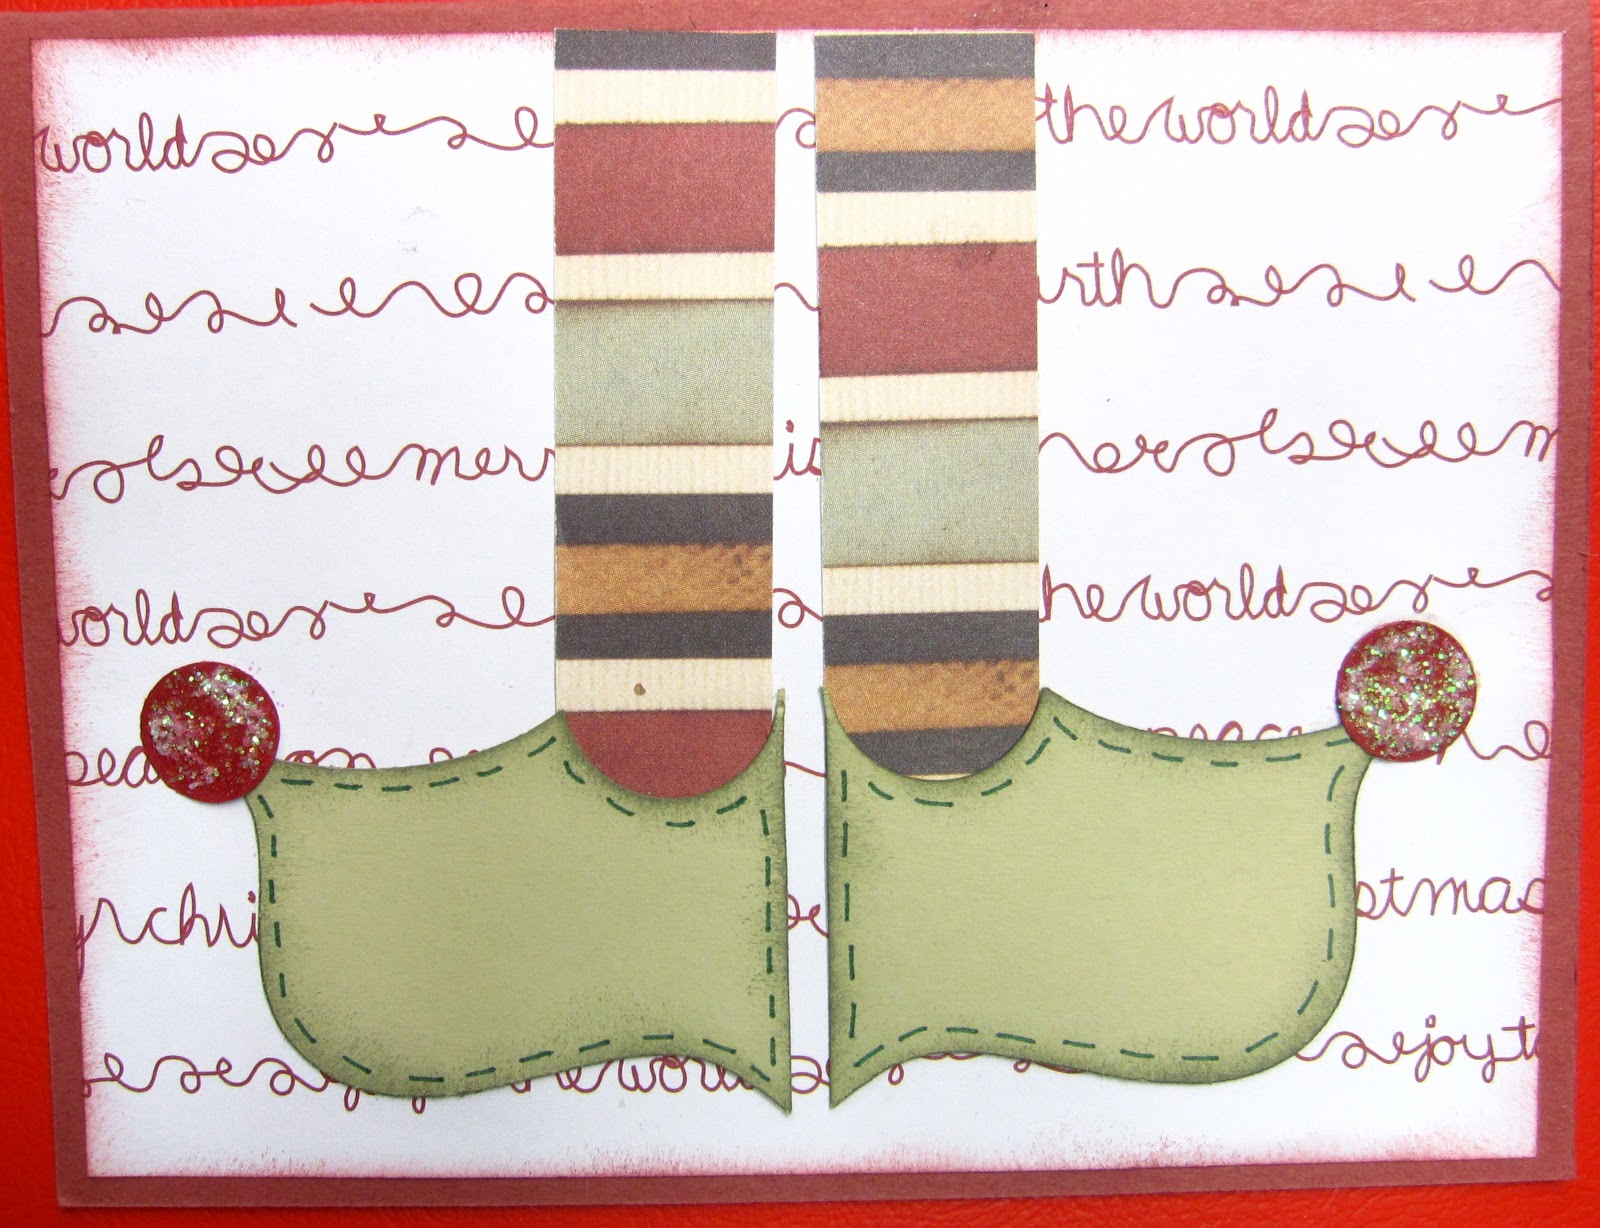
Elf Shoes
Inlay – 5 1/4" x 4" White cardstock
Punch – 1/2" circle punch

Fireside Family
Card – 8 ½” x 5 ½”
Red cardstock
Inlay – 5 ¼” x 4” Red cardstock
Scrap – white for window & planter
Scrap – green for shutters & fern
Stamp Set – Fireplace
Die Cut – Window, planter & shutters (Poppystamps.com)
Nestibility – Small Rectangle 2 3/8” x 1 7/8”
Punch – Pine Branch
Embossing Folder – Tim Holt Brick
Copic Markers – Brick – R29 & R89
Wood – E35 & E29
Greenery & stockings – YG63,
R21, Y11, B21
-
Open card & lay inlay on top
-
Cut
rectangle through the 2 layers
-
Emboss inlay with brick embossing folder
-
Rub crubcake ink pad over embossed bricks
-
Cut our window, planter & shutters
-
Cut out shutters & ferns
-
Glue ferns in planter & pop dot under window
frame
-
Pop dot shutters beside windows
- Glue small picture above fireplace

Three Tree Christmas Card
Card - 11”x 4 ¼”
Stamp - Happy Holidays
Stamp - Merry Merry Christmas Clear Rubber stamp set
Stamp - Merry Merry Christmas Clear Rubber stamp set
Embossing Folder - Swirls
Punch - border punch
- stamp a star, cut out star, glue a jewel in star and glue
to top of cut out tree

Wonderland Tree
Card – 8 ½” x 5 ½”
crumbcake cardstock
Inlay – 5” x 3 ¾” Chocolate Chip cardstock
Inlay – 4 ¾”” x 3 ½” White cardstock
Stamp – Stampin’Up Lovely As A Tree
Stamp – Close to My Heart Winter Wonderland
Stamp – small snowflake
Scribbles – Golden Brown or brown brads
Memento Ink Pads – Desert Sand, Rich Cocoa, Cantaloupe,
Black
Copic Markers – W3 & W1
White Gel Pen
No comments:
Post a Comment